📊 Facebook/Meta Pixel is an analytics tool that allows you to track user activity on your website and measure the effectiveness of Facebook ads.
In this step-by-step tutorial, we will show you how to create your own code Facebook/Meta Pixel and properly implement it on your site.
What is the Facebook Pixel?
Facebook Pixel is a piece of JavaScript code that you place on your website. With it, you can:
Track conversions from Facebook ads
Optimize ads for specific activities
Build audience groups for future advertising
Use remarketing to people who have already interacted with your site
How to create a Facebook Pixel?
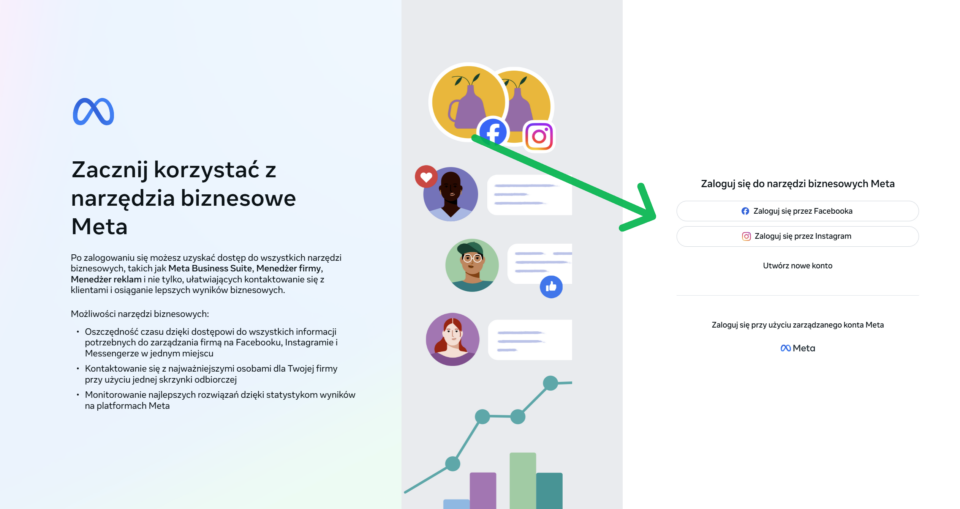
Step 1: Log in to Facebook Business Manager
Tip
If you don't already have a Business Manager account, you can create one at business.facebook.com
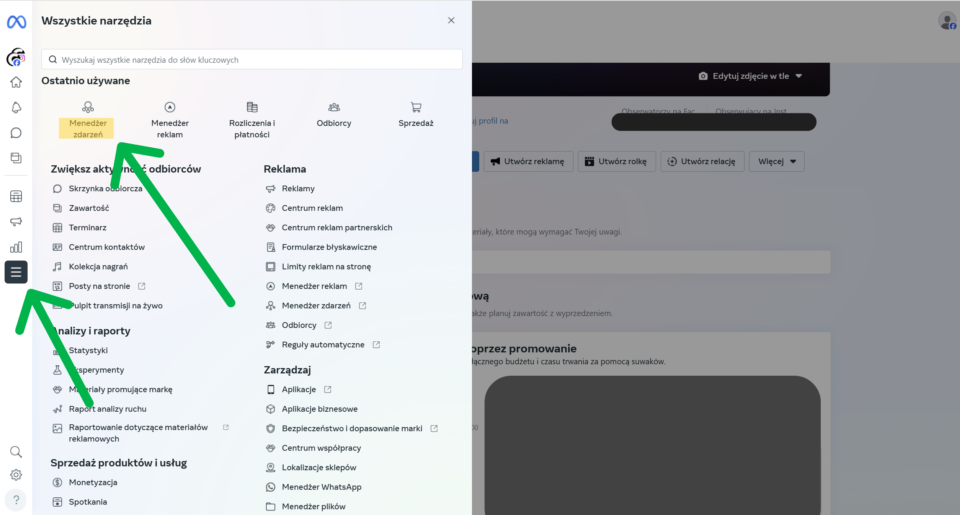
Step 2: Go to the Event Manager
➡️ After logging into your Facebook Business account, click the icon The menu (the so-called "hamburger") in the upper left corner, and then select the option "Event Manager".
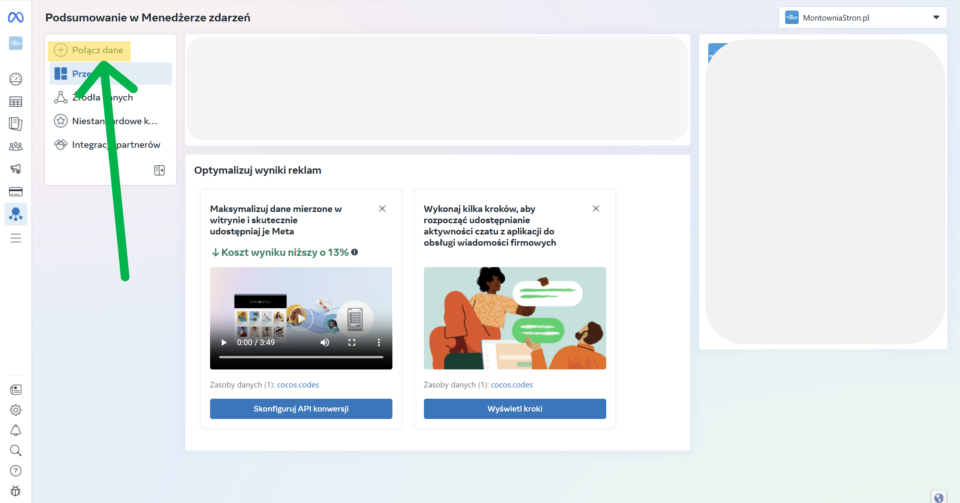
Step 3: Create a new Pixel
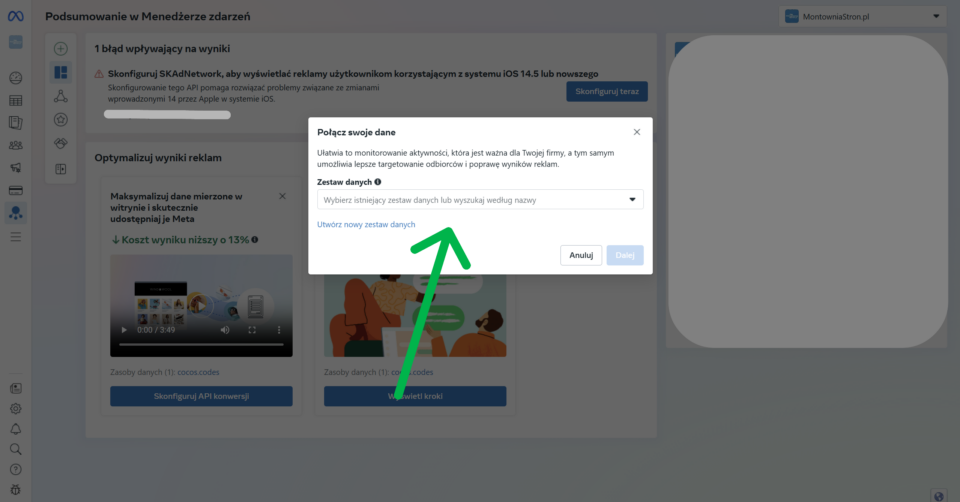
In the Event Manager, click the green ✅ button. "Merge data".
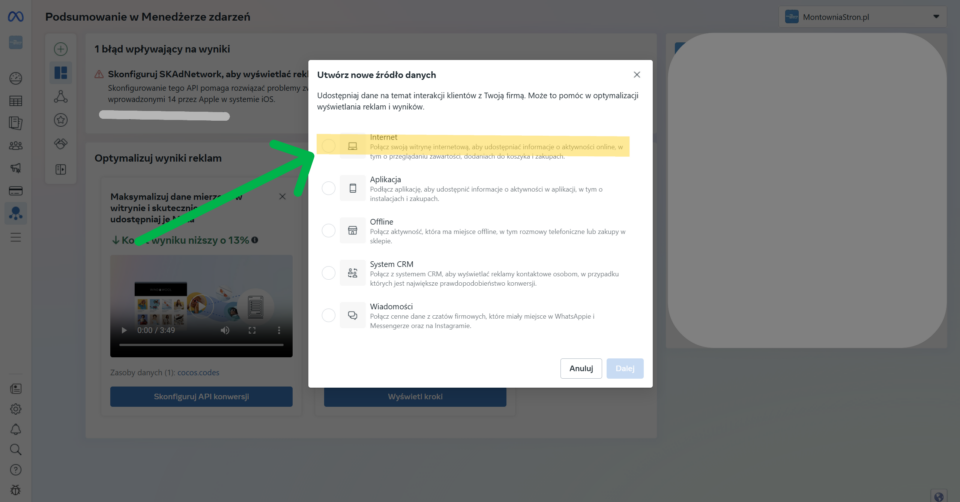
In the new window, select 🌐. "Internet", then click "Next.".
📁 Select "Existing dataset". or click "Create a new dataset"..
The data set is simply the name of the source - such as the name of your website. In our case, it will be: "cocos.codes".
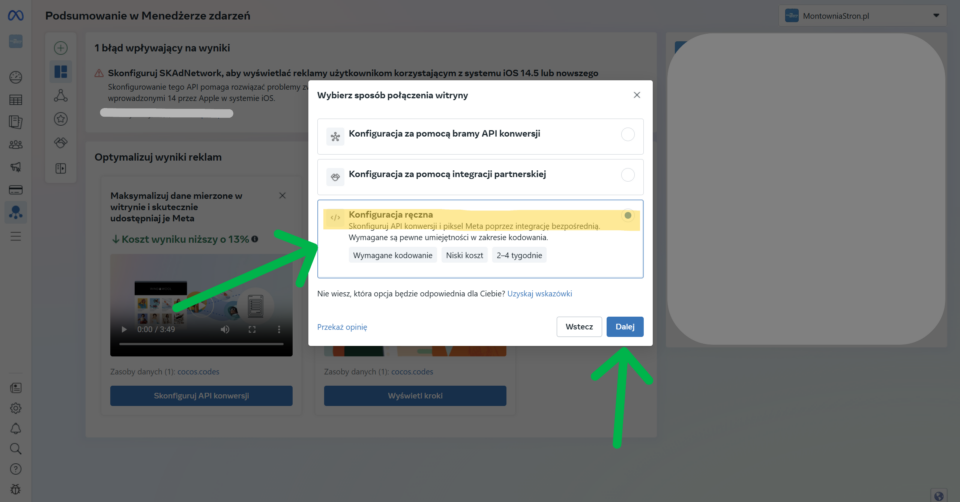
🛠️ Then select "Manual configuration"., then click "Next.".
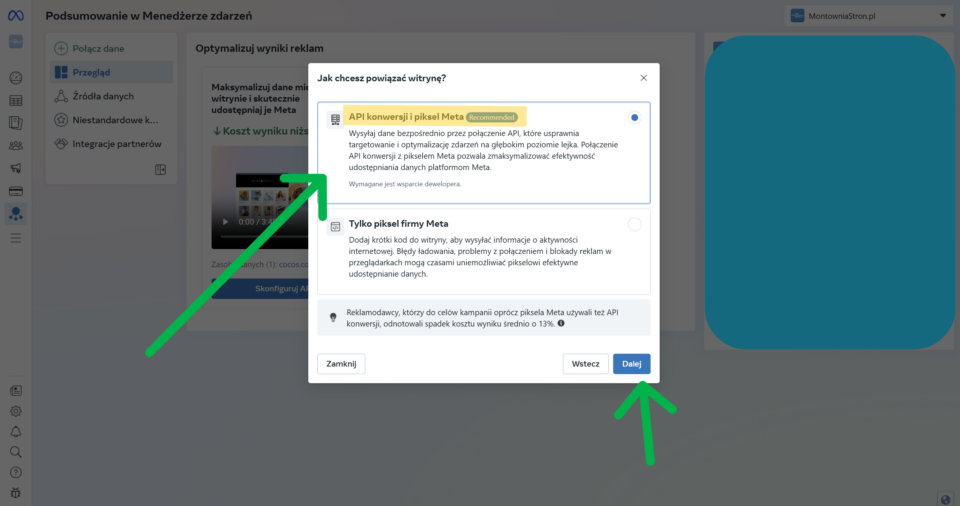
🔄 In the next window, select the option "Conversion API and Pixel Meta"., then click "Next.".
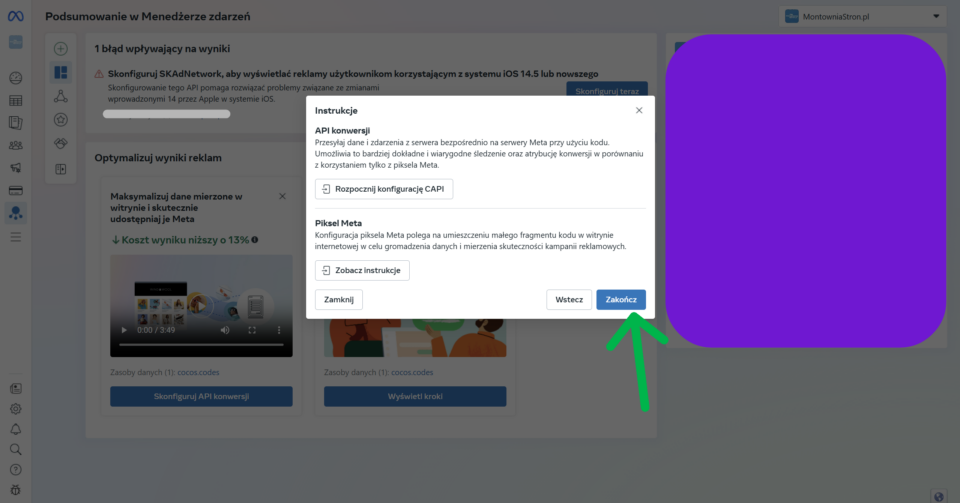
Almost done... still clicking "Finish"
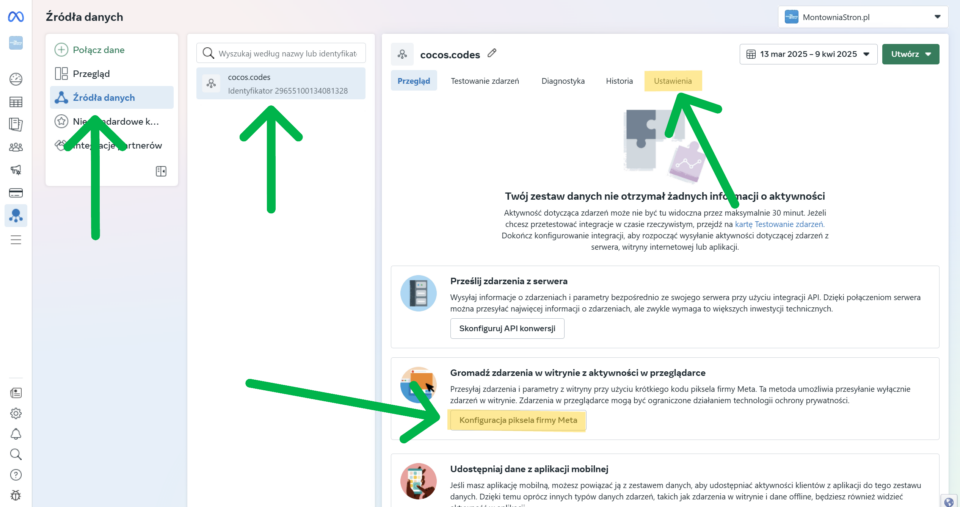
⚙️ Now go to the section "Data Sources"., and then select a previously created source - in our case "cocos.codes". Go to tab "Settings".
📥 If you want to download the HTML code of Pixel, at this stage you can click the button "Configure Meta pixel"..
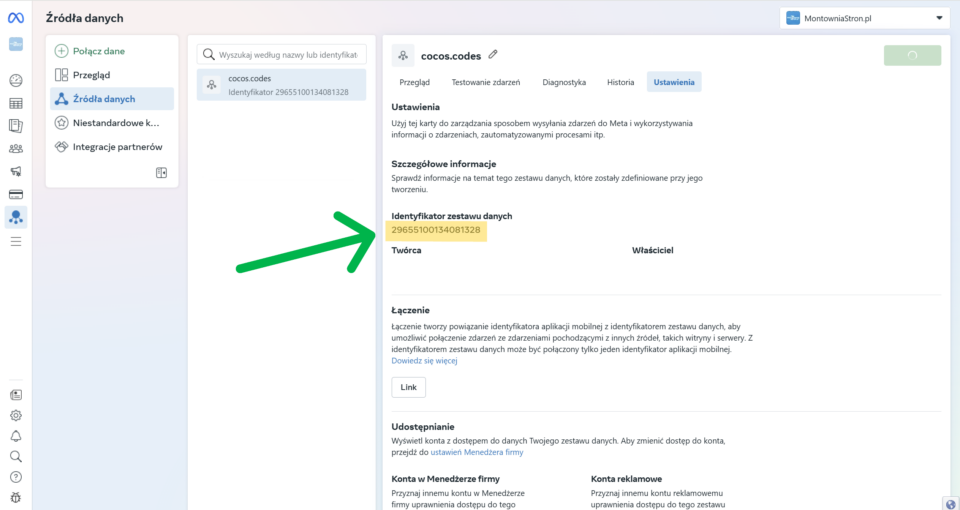
🔎 Under the tab "Settings" find the field "Data set identifier" - it is this number that you will need, for example, to configure the plug-in WordPress Facebook Pixel.
How do you implement Facebook Pixel code on your site?
Step 1: Select the installation method
Facebook offers several methods for installing Pixel:
Manual code installation
Integration with a platform (e.g. Shopify)
Sending instructions to the developer
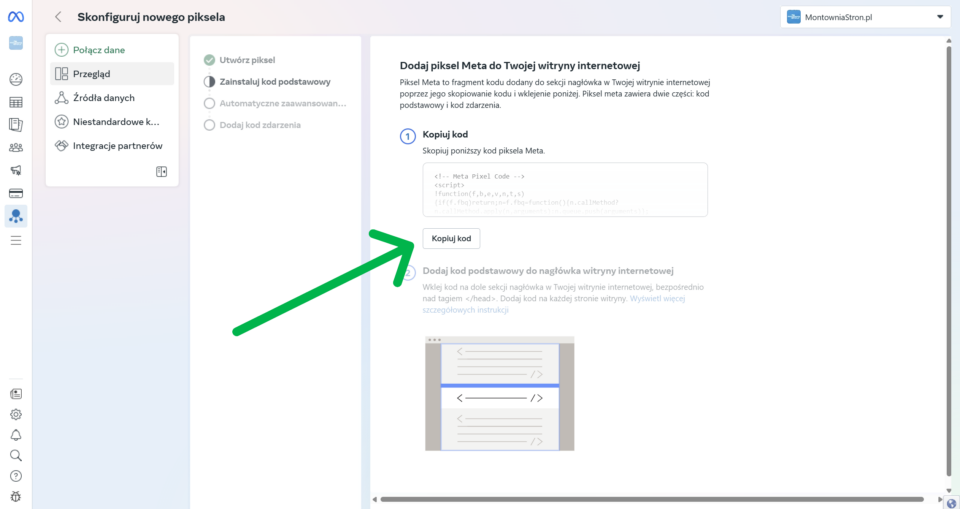
Step 2: Copy the base code of the Pixel
If you chose manual installation, you will see the Pixel base code. Click the "Copy Code".
On the spot {your-pixel-id} will show the unique identifier of your Pixel, consisting of 16 digits.
Step 3: Place the code in the header of your page
The Pixel code needs to be placed in a section of your website. For WordPress, you can do this with a plugin or add the code directly to your theme's header.php file.
Warning
If you're already using other tracking code (such as Google Analytics), make sure you don't overwrite it when adding Pixel.
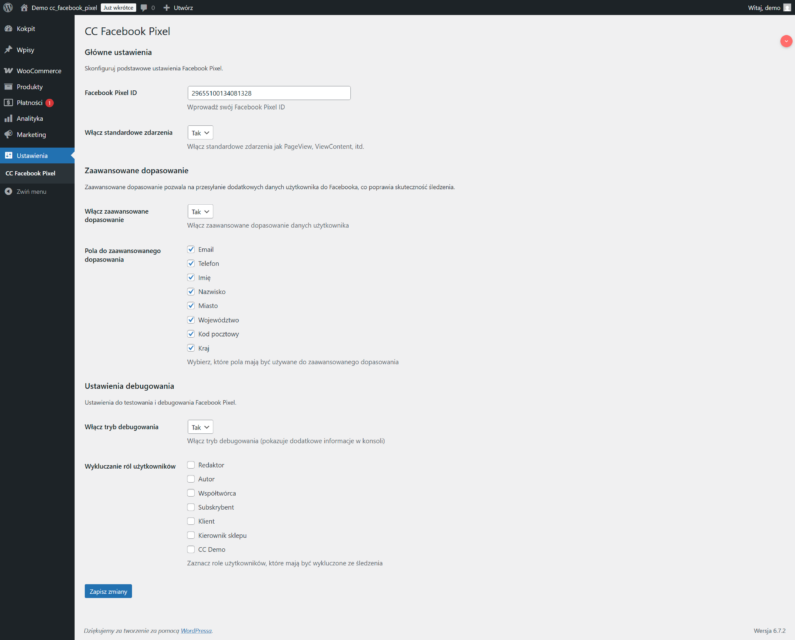
Instead of adding the code manually, you can use a professional plugin Facebook Pixel, which will make the whole integration much easier!
If you want to save time and avoid potential mistakes, our plugin Facebook Pixel is the ideal solution. Thanks to it:
Install Facebook Pixel in minutes without knowing the code
Easily configure all standard and custom events
You will benefit from integration with WooCommerce and other popular plugins
Ensure compliance with RODO with a built-in consent system
You will gain access to detailed statistics directly in your WordPress dashboard
Success guaranteed
With plug Facebook Pixel It will literally take you minutes, not hours, to implement an advanced tracking system. Forget about manually adding code and possible errors!
Step 1: Install the Facebook Pixel Helper extension.
🔧 Pixel Helper is a browser extension Google Chrome, which allows you to check if the Facebook Pixel is working properly on the site. To install it, go to the official Chrome store:
You can also set up events in the Facebook Event Manager.
The most common problems and their solutions
Problem
Solution
Pixel does not record events
Check that the code is correctly placed in the section of the page
Duplicate events
Make sure that the Pixel code is added only once on the page
Browser console errors
Check that the Pixel code does not interfere with other JavaScript code on the page
Problems with GDPR/RODO
Add user consent mechanism before launching Pixel
Compliance with RODO
Info
Facebook Pixel collects user data, so be sure to comply with RODO. Make sure your privacy policy informs your use of Pixel and obtain the appropriate consents.
Example code to implement Pixel consent
// Check if the user has given consent
  function checkCookieConsent() {
    // Here put the logic for checking consent
    return userConsented; // true or false
  }
// Initialize the Pixel only when there is consent
if (checkCookieConsent()) {
fbq('init', '{your-pixel-id}');
fbq('track', 'PageView');
}
Summary
Implementing Facebook Pixel is a key step in optimizing your Facebook marketing efforts. With it, you can:
Measure the effectiveness of ads
Better target your audience
Take advantage of remarketing
Optimize conversions
Success
Congratulations! Your Facebook Pixel should now be up and running. You can now take advantage of the powerful analytics and advertising tools that Facebook offers.
Used to determine whether a user is included in an A / B or Multivariate test.
18 months
_ga
ID used to identify users
2 years
_gali
Used by Google Analytics to determine which links on a page are being clicked
30 seconds
_ga_
ID used to identify users
2 years
_gid
ID used to identify users for 24 hours after last activity
24 hours
_gat
Used to monitor number of Google Analytics server requests when using Google Tag Manager
1 minute
_gac_
Contains information related to marketing campaigns of the user. These are shared with Google AdWords / Google Ads when the Google Ads and Google Analytics accounts are linked together.
90 days
__utma
ID used to identify users and sessions
2 years after last activity
__utmt
Used to monitor number of Google Analytics server requests
10 minutes
__utmb
Used to distinguish new sessions and visits. This cookie is set when the GA.js javascript library is loaded and there is no existing __utmb cookie. The cookie is updated every time data is sent to the Google Analytics server.
30 minutes after last activity
__utmc
Used only with old Urchin versions of Google Analytics and not with GA.js. Was used to distinguish between new sessions and visits at the end of a session.
End of session (browser)
__utmz
Contains information about the traffic source or campaign that directed user to the website. The cookie is set when the GA.js javascript is loaded and updated when data is sent to the Google Anaytics server
6 months after last activity
__utmv
Contains custom information set by the web developer via the _setCustomVar method in Google Analytics. This cookie is updated every time new data is sent to the Google Analytics server.
2 years after last activity
SourceBuster is used by WooCommerce for order attribution based on user source.
Name
Description
Duration
sbjs_session
The number of page views in this session and the current page path
30 minutes
sbjs_udata
Information about the visitor's user agent, such as IP, the browser, and the device type
session
sbjs_first
Traffic origin information for the visitor's first visit to your store (only applicable if the visitor returns before the session expires)
session
sbjs_current
Traffic origin information for the visitor's current visit to your store
session
sbjs_first_add
Timestamp, referring URL, and entry page for your visitor's first visit to your store (only applicable if the visitor returns before the session expires)
session
sbjs_current_add
Timestamp, referring URL, and entry page for your visitor's current visit to your store
session
sbjs_migrations
Technical data to help with migrations between different versions of the tracking feature